3D-Pathfinding in Unreal Engine
Pathfinding in Unreal Engine can become very overwhelming, as soon as you want to go beyond simplistic two dimensional pathing. Luckily there is a plugin, which allows us to create a simple Behavior Tree (from now “BT”) for any kind of pathfinding - even if there are very dynamically moving objects in the level.
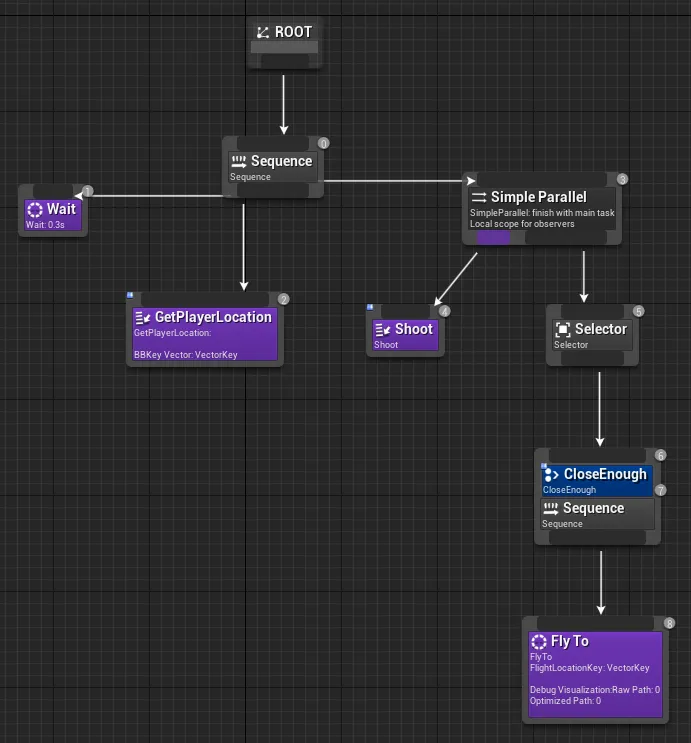
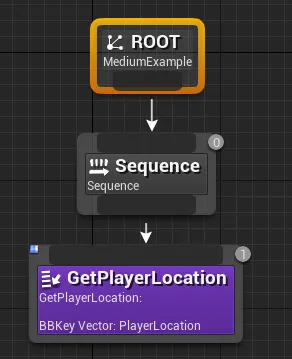
This is the BT we will create. It retrieves the player location and then executes an action (in this case “Shoot”), while flying (pathfinding) towards the player location - if the player is beyond a threshold range. The shoot task will not be explained in this tutorial as there are already plenty of guides about shooting projectiles out there.
Adding the plugin from source
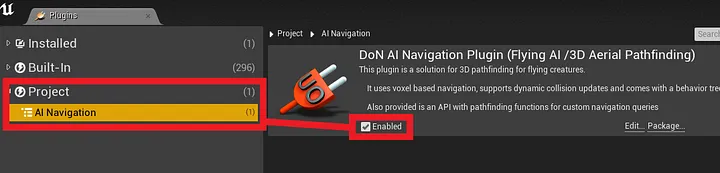
The plugin we will use, is the DonNavigationPlugin. The plugin is licensed MIT, a permissive Open-Source license. The original project is no longer maintained and will not compile with current versions of Unreal Engine, the same goes for the version you can find on the market place. The linked repository is my fork and contains some fixes and relevant updates for versions 4.23 or higher and also Unreal Engine 5.
If it does not yet exist, create a directory called “Plugins” in the root directory of your project (the root directory of your project is the directory within which the uproject-file is located). Download or clone the plugin into the plugin directory. Now open the engine, go to Edit->Plugins, scroll all the way down. There should now be a tab called “Project”, with the plugin listed there. Enable the plugin and restart the engine editor. You should now be displayed a prompt, asking if the plugin should be built from source.
Retrieving the target Location
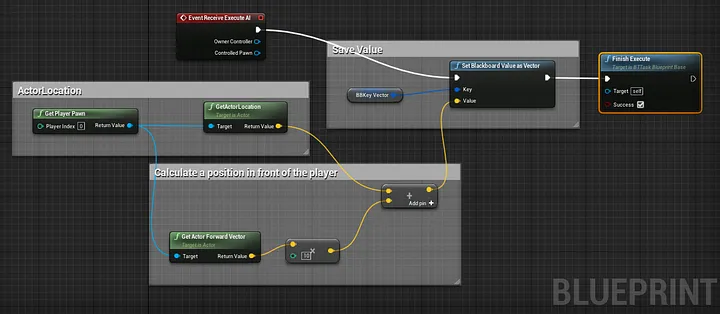
Before we can follow the player, or anything else, we need to know it’s location. There are many ways to accomplish this, but we will go with the most basic: A custom task called “GetPlayerLocation”, which retrieves the players position and saves it into a blackboard key. A blackboard is a a key-value store which can be associated with a behavioral tree.
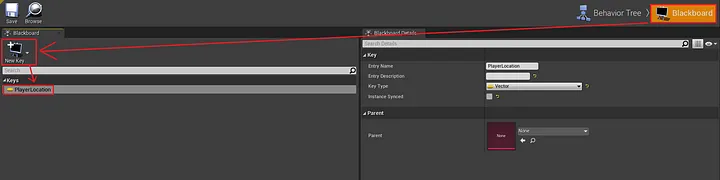
Firstly create the blackboard and a Vector3d-key to store the player location.

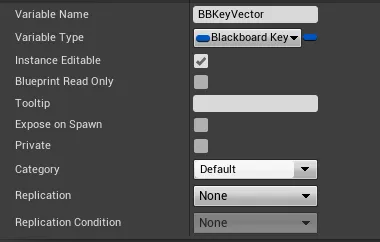
Secondly, right next to “New Blackboard”, create a new task and call it “Get Player Position”. Add the Vector3d blackboard key as a parameter. Make it public.
Get the player pawn, and the location of the pawn in the blueprint and save it as a blackboard value. It’s usually better, to calculate a position in front of the player, rather then try to path-find to a position within the player mesh. This can be achieved by using “GetForwardVector” on the player pawn and multiplying it by the desired distance to the center of the player mesh. Use the blackboard value parameter and the “SetBlackboardValueAsVector”-node to save the computed value. Finally call the “FinishExecute”-node to indicated the task has finished.
Now add the newly created task to a basic sequence in the BT.
Fly to - Task
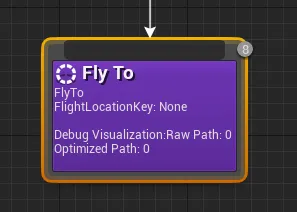
When the plugin has loaded correctly, we should be able add a task called “Fly to”, which the plugin provides. This task requires the blackboard Vector3d key from earlier as “FlightLocationKey”. This key is also the only mandatory value you have to set. The options are mostly self explanatory and can also mostly be left to the default values for now. Most interesting perhaps, for first time users, are the “Debug Params”, which offer various visualizations during play.
Threshold distance decorator
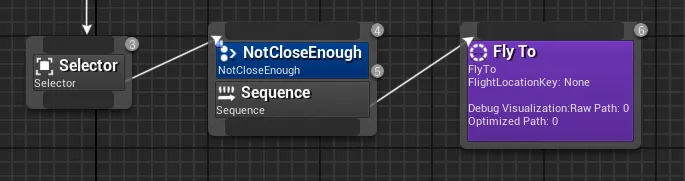
The setup created so far already works, but the “Minimum Proximity Required”-parameter, which specifies the maximum distance, by which the node considers to have “arrived” at the target and stop flying, can be slightly unreliable. This can be improved on, by only running the “Fly To”-task, if the pathfinding object is a above a certain threshold distance from the player.
Create a new decorator, next to the new task creation. Decorators can be used in concordance with “Selectors” to create a conditional sequence. Use the “New Decorator”-button, right next to “Create Task”, to create a new decorator, called “NotCloseEnough”.
The decorator has to overwrite the function “PerformConditionCheck”
In the newly created decorator blueprint, click “+” and select PerformConditionCheck
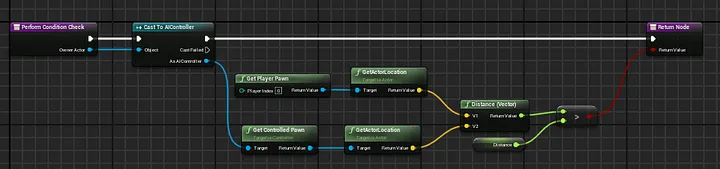
Again, we need to get the player pawn, query the AI controller and run the BT for it’s controlled pawn. We can then use the distance-node to retrieve the distance between the two location (3D vectors in this case) and compare the result to a threshold value. Obviously the “GetPlayerPawn -> GetActorLocation” could be replaced by any target location. It might also be advisable, to have a maximum distance check for performance reasons, which is not displayed here.

##Making the Chair chase the player Add an AI-Controller- and a Character-Blueprint, set the “AI Controller Class” in the “Pawn” Section of your Character to the AI-Controller you just created.
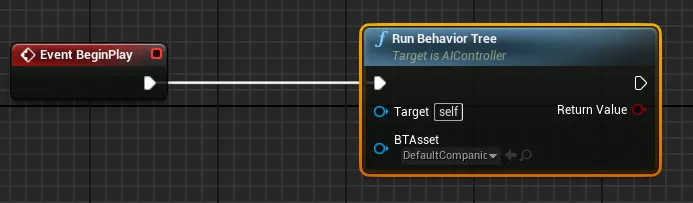
Open your AI-Controller and add a “RunBehaviourTree”-node to the “EventBeginPlay” execution sequence. Select the BT we have created in the first step as “BTAsset”.
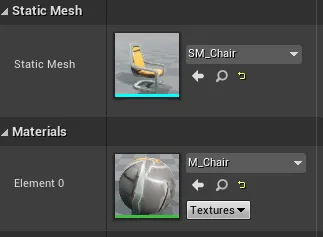
In the Character-Blueprint, add a static mesh via “Add Component”:

In my case, I have added the standard Unreal chair.
Finally , you might want to check, “Orient Rotation to Movement” in the “Character Movement Component”, to make the chair turn in the right direction instead of just strafing to the target.
by Yannik Schmidt
Tags: Unreal Engine, Pathfinding, Algorithms